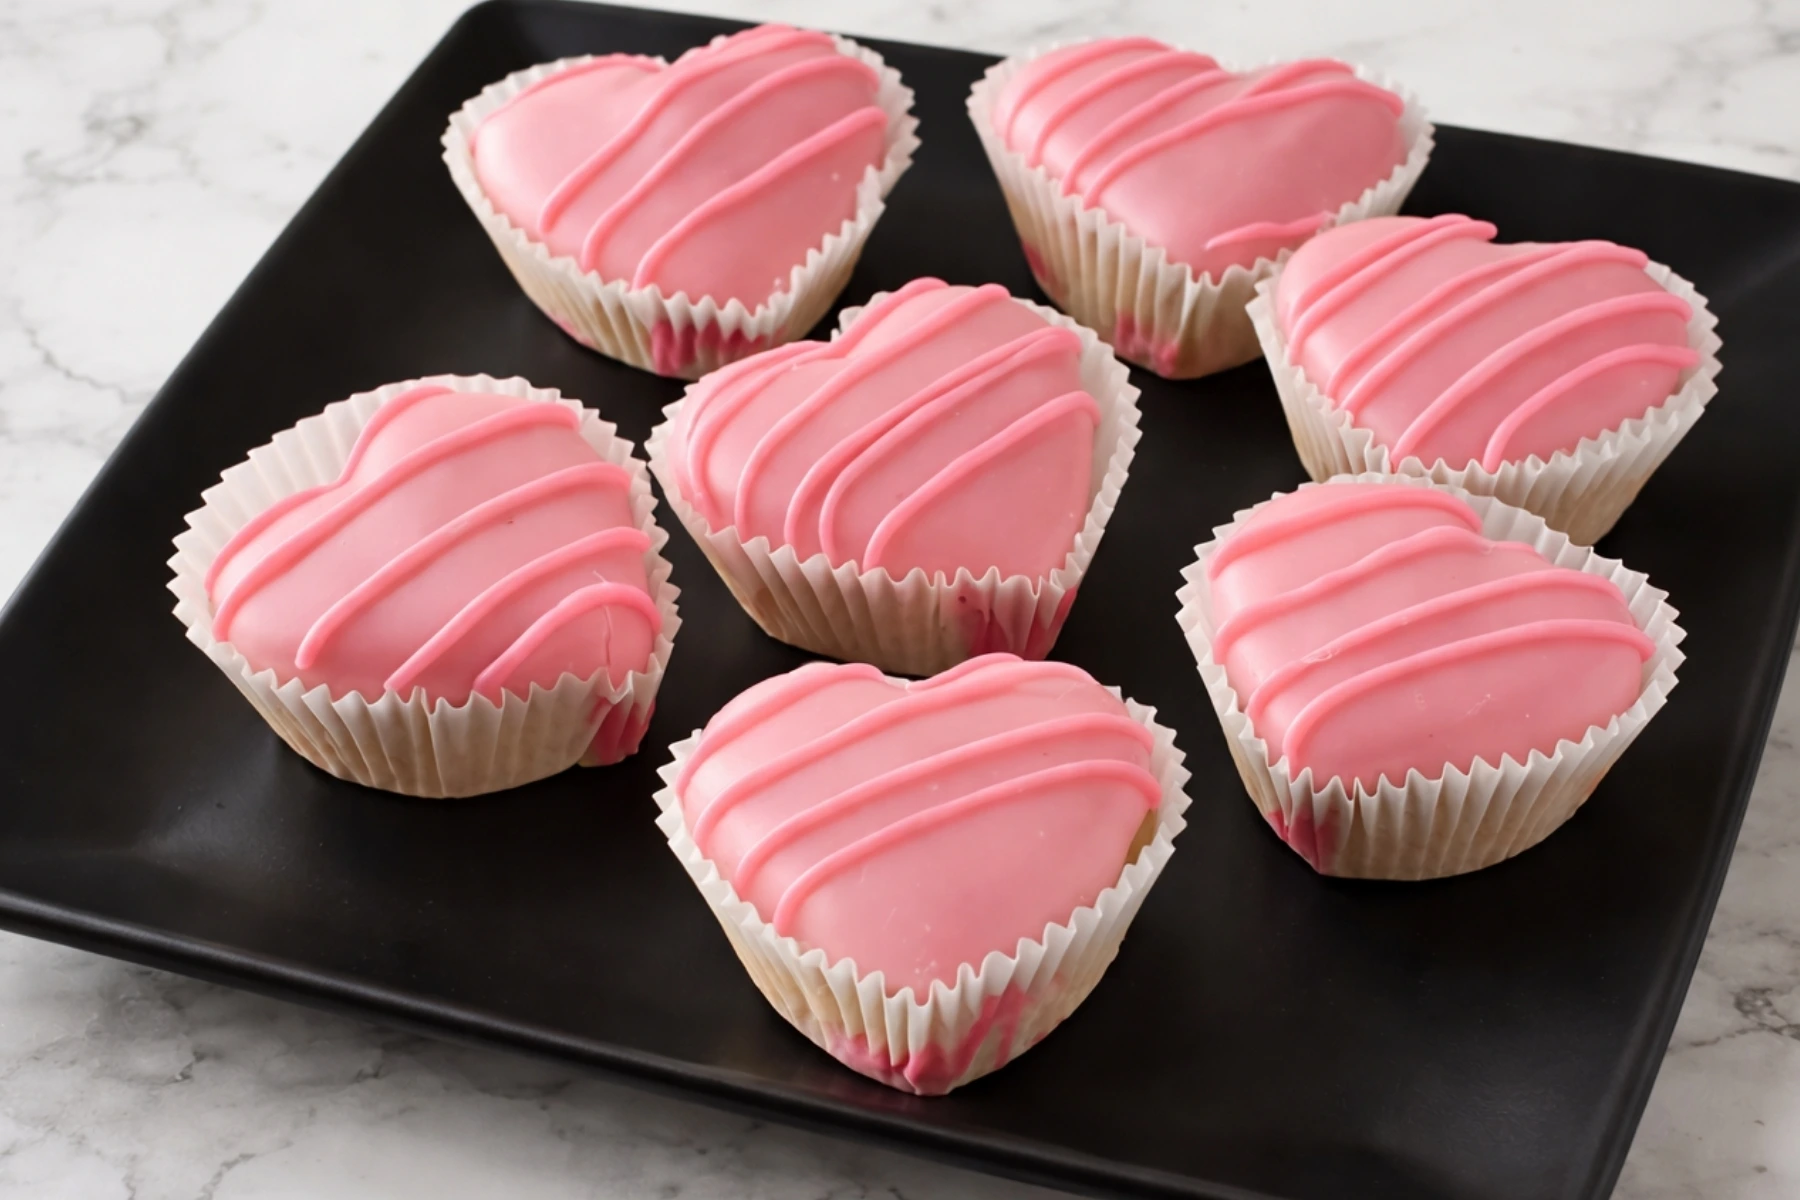
Valentine’s Day is a time for love, creativity, and sweet treats, and these Valentine’s Heart Petit Fours are the perfect way to celebrate! These bite-sized cakes are a delightful combination of soft cake, sweet icing, and a touch of chocolate drizzle. Whether you’re making them for a special someone, a family gathering, or just because you love a little festive baking, this recipe is sure to impress.
In this guide, I’m going to walk you through every step of making these adorable, heart-shaped mini cakes. Don’t worry if you’re new to baking—this recipe is simple, customizable, and sure to make your kitchen smell delicious. Let’s dive in!

Ingredients You’ll Need FOR Valentine’s Heart Petit Fours
Before you get started, let’s gather all the ingredients. This recipe is flexible, so you can adjust things based on your preferences, but here’s what you’ll need to get going:
For the Petit Fours Cake:
- Petit Four Cake: You can use a homemade pound cake or angel food cake as the base (more on that in a moment). If you love cake, check out this Strawberry Cheesecake Cookie recipe for a fun twist on classic flavors.
- Cream Cheese Frosting or Jam (Optional): If you want to add a little filling, cream cheese frosting or raspberry jam works beautifully.
For the Petit Four Icing:
- 4 cups powdered sugar
- ½ cup milk or heavy cream
- 1 tsp vanilla extract
- 1 drop pink gel food coloring (to add that lovely Valentine’s touch)
For the Drizzle and Decoration:
- Pink candy melts
- Heart-shaped cookie cutter (the smallest one works best)
- Cupcake liners for presentation
Now that we’ve got the ingredients ready, let’s walk through the steps to create these charming treats.
A Step-by-Step Guide
Step 1: Preparing the Cake
To start, you need a good base. I recommend using a pound cake or angel food cake for this recipe. I have a fantastic recipe for Petit Four Cake that I always turn to. However, you can also use store-bought cake if you’re in a pinch. For more easy dessert ideas, you might enjoy this Red Velvet Cream Cheese Bundt Cake.
Once your cake is baked and cooled, the next step is crucial: chilling it. Pop the cake in the freezer for about 10–15 minutes. This will make it so much easier to cut into clean, precise heart shapes without the cake falling apart.
While the cake is chilling, you can decide if you’d like to add a filling. A layer of cream cheese frosting or raspberry jam works wonders to add flavor and moisture to the petit fours. Just spread a thin layer of your chosen filling between the layers before cutting.
Step 2: Cutting the Heart Shapes
Now comes the fun part! Use your heart-shaped cookie cutter to cut out small hearts from the chilled cake. Be gentle as you press the cutter down to avoid squishing the cake. After you cut out a heart shape, lift the cutter carefully and push the cake out from the bottom to maintain its shape.
If you find that the cake sticks a bit to the cutter, try dipping the cutter into a little flour or powdered sugar to prevent sticking.
Once you’ve cut out all your hearts, place them on a wire rack over a baking sheet to catch any icing drips. It’s also a good idea to lay down a piece of wax paper under the rack for easy cleanup later.
Step 3: Preparing the Icing
Next up: the icing! This is what gives the petit fours their beautiful glossy finish. The icing is quite simple, and it’s key to making these little cakes sparkle.
To make the icing, you’ll need to:
- Mix powdered sugar with milk (or heavy cream) and vanilla extract until the mixture is smooth.
- Add a drop of pink gel food coloring to give your icing a soft, romantic hue. Adjust the amount of coloring until you achieve your desired shade of pink.
- Check the consistency—your icing should be pourable but not too runny. If it’s too thick, add a little more milk. If it’s too thin, add more powdered sugar.
Once your icing is ready, you’re good to go!
Step 4: Icing the Valentine’s Petit Fours
This step is where the magic happens. Take each heart-shaped cake and gently pour the icing over it. Start at the center of the heart and work your way outward, allowing the icing to spread naturally. The goal is to cover the entire top and sides, but don’t worry if a little icing drips off—this is totally normal!
Let the icing set for 1-2 minutes. You’ll know it’s ready when it has a smooth, glossy finish.
Step 5: Adding the Chocolate Drizzle
Now for a little extra flair—melted pink candy melts! This is what makes your petit fours stand out. Melt the candy melts in the microwave in 30-second intervals, stirring in between, until they’re completely smooth.
Once melted, place the candy melts in a disposable frosting bag or a zip-top bag with the corner snipped off. Drizzle the melted candy over the iced petit fours in a criss-cross pattern for a fun and decorative touch.
Let the drizzle set before moving on to the next step. It’s a great idea to leave these little cakes on the wire rack until the candy drizzle has hardened.
Step 6: Final Touches
This step is optional, but if you want to give your petit fours a little more polish, place each one in a cupcake liner. Not only does this make them look cute, but it also makes them easier to handle and serve.

When you’ve finished decorating, set the petit fours aside for about 10-15 minutes to let everything fully set. Then, you can enjoy your beautiful Valentine’s Day treats! If you’re looking for more fun ideas, check out Slice and Bake Valentine’s Day Cookies.
Tips and Tricks for Perfect Petit Fours
Before you head into the kitchen, here are some handy tips to make your baking experience even smoother:
- Chill the cake well: Always chill your cake before cutting. This will help you get neat, clean heart shapes and avoid any crumbling.
- Customize the flavors: You don’t have to stick to the basics. Try swapping the pink icing for red, white, or even an ombre effect. You can also experiment with different fillings like lemon curd, chocolate ganache, or even strawberry preserves.
- Add some sparkle: For an extra festive touch, sprinkle a little edible glitter or nonpareils over the icing while it’s still wet.
- Be creative with the drizzle: If you’re feeling extra crafty, try a white chocolate drizzle or even a dark chocolate drizzle for contrast.
- Don’t rush the icing: Be patient and let the icing set before adding the drizzle or moving the petit fours.
Variations and Customizations for Valentine’s Heart Petit Fours
One of the best things about making petit fours is that they’re easily customizable. Here are a few ideas for mixing things up:
- Different Colors: While pink is a natural choice for Valentine’s Day, you can switch up the color scheme for different occasions. Try red for Christmas or pastel shades for a spring celebration. You might also like these Valentine’s Caprese Skewers for a savory treat to pair with your desserts.
- Flavor Variations: If you’re not a fan of raspberry jam, you can try different fillings such as lemon curd, chocolate ganache, or even strawberry preserves.
- Decorative Touches: Top your petit fours with edible flowers, colorful sprinkles, or even a dusting of powdered sugar for an elegant look.
Why You’ll Love This Recipe

Making Valentine’s Heart Petit Fours is a fun and rewarding experience. Not only do you end up with a beautiful treat, but you can also feel proud of the personal touch you’ve added to your Valentine’s celebration. If you’re craving more heart-shaped treats, don’t miss out on Maraschino Cherry Chocolate Chip Cookies.
This recipe is perfect for anyone—whether you’re a seasoned baker or a beginner. Plus, it’s great for family baking sessions. Kids will love helping with the icing, drizzling, and decorating, making these petit fours a wonderful family-friendly activity.
FAQs: Valentine’s Heart Petit Fours
Can I use a different cake flavor for the petit fours?
Absolutely! While a pound cake or angel food cake works beautifully, you can experiment with other flavors like chocolate cake, lemon cake, or even vanilla cake. Feel free to get creative and make these petit fours your own. If you want to try something fun, check out our Red Velvet Cake Minis for another Valentine’s Day twist.
How do I store leftover petit fours?
Store your finished petit fours in an airtight container at room temperature for up to 3-4 days. If you want to keep them longer, you can refrigerate them for about a week. Just make sure they’re well covered to maintain the freshness of the icing. If you’re making them ahead of time, they can also be frozen for up to 2 months—just allow them to thaw at room temperature when ready to serve.
Can I use store-bought icing for the petit fours?
Yes, you can! While homemade icing is ideal for the best texture and flavor, store-bought fondant or icing can work in a pinch. If you go the store-bought route, choose a thick icing that’s easy to work with and pour over the petit fours.
How do I prevent the icing from dripping too much?
To ensure your icing stays put and doesn’t drip excessively, make sure your icing is the right consistency. It should be thick enough to coat the petit fours but not run off completely. If it’s too thin, add a little more powdered sugar. If it’s too thick, add a little milk or cream. Let each petit four sit for a few minutes after icing to let the excess drip off naturally.
Call to Action: Share the Love!
If you tried these Valentine’s Heart Petit Fours, I’d love to hear about your experience! Did you make any fun modifications or try a new flavor? Leave a comment below and share your thoughts.


Don’t forget to save this recipe to your Pinterest board for next Valentine’s Day (or whenever you want a sweet treat). It’s always nice to have something cute and easy to bake for a special occasion!
Happy baking, and enjoy your lovely petit fours!
Print
Valentine’s Heart Petit Fours
- Total Time: 1 hour 15 minutes
- Yield: About 12 petit fours 1x
Description
Celebrate Valentine’s Day with these charming heart-shaped petit fours. Soft cake layers, sweet icing, and a chocolate drizzle make them a perfect treat for any occasion, and they’re easily customizable for your personal touch.
Ingredients
- Pound cake or angel food cake (homemade or store-bought)
- Cream cheese frosting or raspberry jam (optional filling)
- 4 cups powdered sugar
- ½ cup milk or heavy cream
- 1 tsp vanilla extract
- 1 drop pink gel food coloring
- Pink candy melts
- Heart-shaped cookie cutter (smallest one works best)
- Cupcake liners (for presentation)
Instructions
- Chill your cake for 10–15 minutes to make cutting into shapes easier.
- Cut the chilled cake into heart shapes using a heart-shaped cookie cutter.
- Mix powdered sugar with milk and vanilla extract. Add pink gel food coloring to create a soft pink hue.
- Pour the icing over the heart-shaped cakes, letting it set for 1-2 minutes.
- Melt the pink candy melts and drizzle over the iced petit fours.
- Let the drizzle set, and optionally place the petit fours in cupcake liners for easy serving and presentation.
Notes
Customize the filling and drizzle colors to suit any occasion. Edible glitter or sprinkles can be added for extra decoration.
- Prep Time: 15 minutes
- Cook Time: 1 hour
- Category: Dessert
- Method: No-bake (chill and decorate)
- Cuisine: American
Nutrition
- Serving Size: 1 petit four
- Calories: 150
- Sugar: 15g
- Sodium: 50mg
- Fat: 7g
- Saturated Fat: 3g
- Unsaturated Fat: 4g
- Trans Fat: 0g
- Carbohydrates: 22g
- Fiber: 1g
- Protein: 2g
- Cholesterol: 15mg