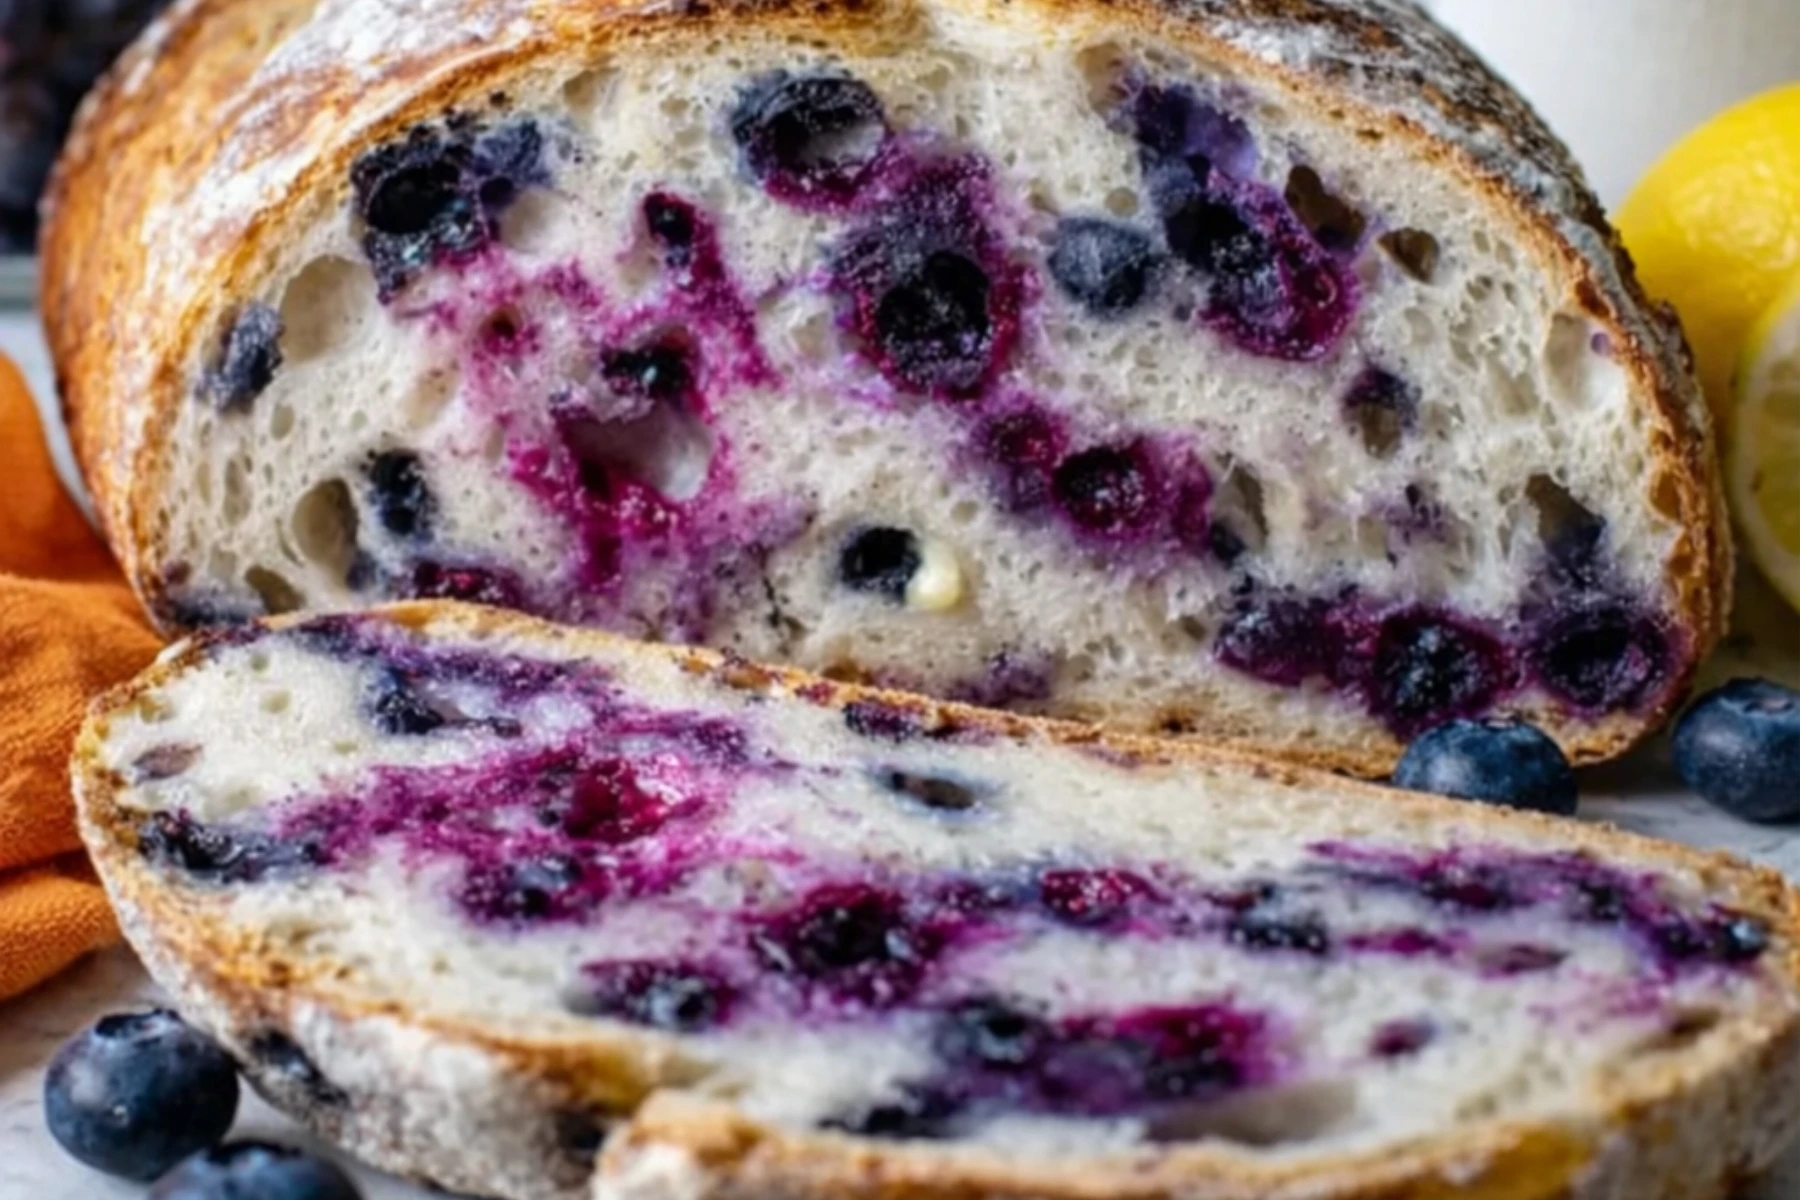
Okay, so story time. The first time I made this lemon blueberry sourdough, I was scrambling for something to bring to my sister’s brunch. I didn’t want to show up with just regular bread, you know? I wanted something that screamed “I totally have my life together” even though I definitely don’t.
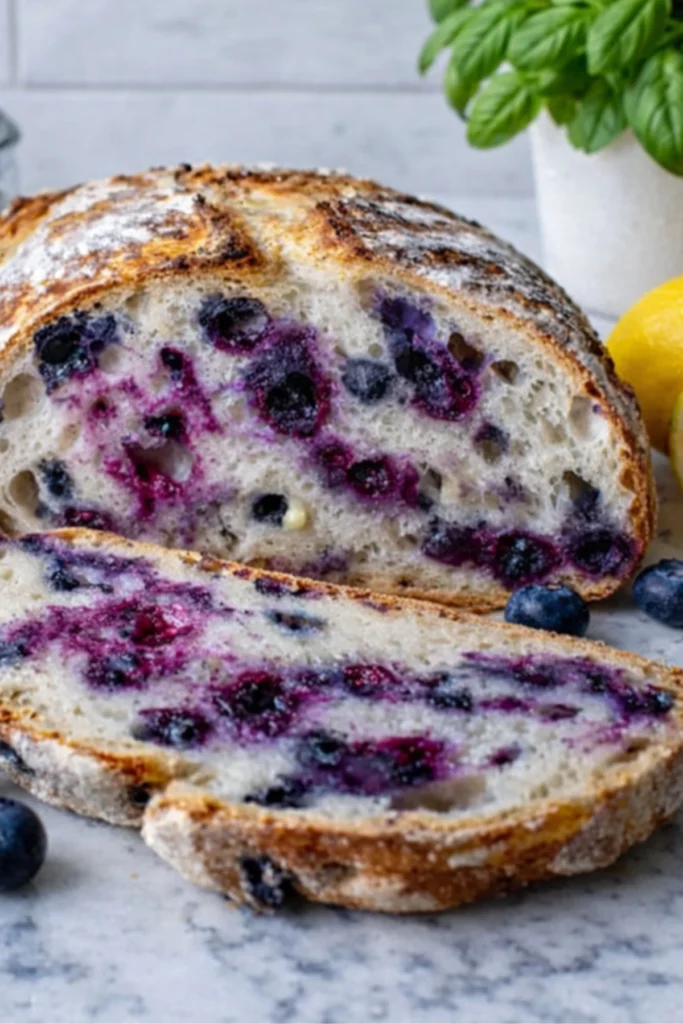
When I pulled this thing out of the oven with its gorgeous golden crust and those cute little purple streaks running through it, I literally did a happy dance in my kitchen. My husband thought I’d lost it, but whatever. This bread is THAT good.
Now it’s my secret weapon whenever I need to impress someone. It’s got all that tangy sourdough goodness, plus the lemon makes everything bright and zingy, and then you get these sweet bursts of blueberry? Chef’s kiss. Seriously.
And here’s the thing – it looks way fancier than it actually is to make. If you’ve tackled regular sourdough before, you’ve totally got this. And if you’re new to the whole sourdough game? Don’t stress. I’m gonna hold your hand through the whole thing.
Why This Recipe Actually Works (Unlike Some Others I’ve Tried)

Look, I’ve made my fair share of fruit bread disasters. You know the ones – they come out all dense and sad, or the fruit turns everything into a soggy mess. Not cute.
This recipe’s different though. It’s got just the right balance so the blueberries don’t turn your dough into a puddle, and the lemon zest adds tons of flavor without making things weird and wet.
My seven-year-old daughter is obsessed with blueberries, so we’ve probably made this like twenty times together. Each time we figure out something new about how the dough works. Plus, she thinks the purple swirls are magical, which honestly makes the whole process worth it. If you’re looking for other blueberry stuff to make with the kids, my blueberry loaf is super easy and way less involved than this.
What You’ll Need (Don’t Worry, It’s Pretty Simple)
Before we dive in, let’s talk ingredients. You don’t need anything fancy, but quality stuff does make a difference when you’re making bread this simple.
The Main Stuff
Bread flour is what I use because it’s got more protein than regular flour. That means better structure and that nice chewy texture we’re going for. I measure out about 500 grams (roughly 4 cups), but seriously, get a kitchen scale if you don’t have one. It’s a total game-changer for bread baking.
Water should just be room temp – about 350 grams or 1 1/2 cups. Don’t use cold water or you’ll slow everything down, and definitely don’t use hot water unless you want to kill your starter. That’d be sad.
Active sourdough starter is the star of the show. You need 100 grams of the bubbly, happy stuff. Like, it should’ve been fed in the last 4-8 hours and be all puffy and active. If your starter’s looking sleepy, your bread’s not gonna rise right.
Salt – about 10 grams or 1 3/4 teaspoons. This isn’t just for flavor, it actually helps make the gluten stronger.
Lemon zest from two lemons. I always go organic when I’m zesting because nobody wants pesticides in their bread. Gross.
The Optional Extras
I throw in a tablespoon of honey because it gives the yeast a little boost and adds this subtle sweetness that’s perfect with the blueberries. You can use sugar or skip it entirely – you do you.
A teaspoon of lemon juice amps up that citrus vibe. My friend Sarah insists this is essential, but honestly? Sometimes I forget and it’s still amazing.
The Star of the Show
About 150 grams (one cup) of fresh blueberries. I mean, you CAN use frozen, but fresh ones hold up way better when you’re folding them into the dough. Trust me on this one.
Let’s Talk Timeline (Because This Isn’t a Quick Project)
Here’s what nobody tells you when you first get into sourdough – you gotta plan ahead. This isn’t like “oh, I want bread for dinner tonight” kind of thing.
We’re looking at about 24 hours from start to finish here. But before you freak out, most of that is just waiting around while the dough does its thing. You’ll probably spend like 30 minutes actually working on it.
I usually start in the morning, do the stretchy fold thing throughout the afternoon (more on that later), then stick it in the fridge overnight. Next morning? Fresh bread for breakfast. It’s perfect.
If you need something faster for breakfast though, my carrot cake pancakes are ready in like 30 minutes and they’re ridiculously good.
Alright, Let’s Actually Make This Thing
Step One: Mix It Up and Let It Chill
So first up, we’re doing this thing called autolyse. Fancy French word that basically means “let the flour and water hang out for a bit.”
Just dump your flour and water into a big bowl and mix it until everything’s wet and you’ve got this shaggy mess of dough. I use my hands because I’m weird and like feeling it come together, but a wooden spoon works fine too.
Cover it with a towel or some plastic wrap and ignore it for 45 minutes. During this time, the flour’s soaking up all that water and the gluten starts forming without you even doing anything. It’s honestly kind of magical.
I always set a timer because I’ll 100% forget otherwise. Actually, last week I totally spaced and left mine for two hours. It was still fine, so don’t panic if you get distracted.
Adding the Good Stuff
After your dough’s had its little spa treatment, spread your sourdough starter all over it. Sprinkle on the salt.
Now add your lemon zest. Pro tip – rub it between your fingers as you add it. The smell is INCREDIBLE. Like, bottled sunshine levels of good.
If you’re doing the honey and lemon juice, toss those in too. Then just squish everything together with your hands. Reach under, grab some dough, squeeze it through your fingers, turn the bowl, repeat. Keep going till it’s all mixed together.
It’s gonna be sticky and kinda wet. That’s totally normal. Do NOT add more flour, even though you’ll be tempted.
Time for the Blueberries
Okay, this part gets messy. I’ve learned to just embrace the purple hands at this point.
Throw your blueberries on top of the dough. Get your hands wet (helps with the sticking), then gently fold the dough over the berries. Rotate, fold again. You’re not kneading – just being chill and encouraging those berries to spread out.
Some are gonna burst. Every. Single. Time. And you know what? Those purple streaks look awesome. My kids call this “galaxy bread” because of all the purple swirls. I love it.
Don’t stress about perfect distribution right now. The next step’s gonna help with that.
The Stretch and Fold Marathon
Over the next two hours, you’re gonna do four sets of stretch and folds, every 30 minutes. This is how we build strength in the dough without beating it up (which would be bad for our delicate berries).
Here’s how: wet your hands, reach under one side of the dough, stretch it up as far as it’ll go without ripping, fold it over to the other side. Turn the bowl 90 degrees. Repeat. Do this four times total around the bowl.
Cover it, wait 30 minutes, do it again. Four times total over two hours.
I actually love this part because it fits perfectly into normal life. Do a stretch and fold, throw in some laundry, come back for the next one. Easy.
Bulk Fermentation (AKA The Waiting Game)
After your last stretch and fold, just cover your dough and walk away for 4 to 6 hours. This is where all the flavor magic happens.
Your kitchen temp matters a LOT here. My kitchen’s pretty warm in summer (like 75 degrees) and my dough’s usually ready in about 4 hours. Winter? More like 6 hours, sometimes longer.
You want it to puff up by about 50-75%. It should feel all airy and jiggly, with bubbles on top and around the edges.
Here’s the thing though – don’t just trust the clock. Poke your dough with a wet finger. If the indent slowly fills back in, you’re good. If it bounces back super fast, give it more time.
Shaping Time (Don’t Be Scared)
Okay, so bulk fermentation’s done. Time to shape this baby. I used to be terrified of this part, but honestly? Sourdough’s pretty forgiving.
Flour your counter lightly and plop your dough out. It’s gonna be all soft and puffy and full of air. Handle it gently – you wanna keep those bubbles.
For a round loaf, I fold the edges toward the middle, working my way around in a circle. Flip it over so the seam’s down, then use your hands to kinda drag it toward you on the counter. This creates tension on the surface, which gives you that nice round shape.
Put it seam-side up in a floured proofing basket (or a bowl with a floured towel – works just as well). I use rice flour for dusting because it doesn’t get absorbed like regular flour, so the dough pops right out later.
Cover it and stick it in the fridge for 8-12 hours. This slow proof is where the flavor really develops, plus it makes the dough way easier to score tomorrow.
Getting Ready to Bake
Next morning, about an hour before you wanna bake, crank your oven to 475°F. Put your Dutch oven or baking stone in there to heat up too.
This is super important. That screaming hot Dutch oven creates instant steam when your dough hits it, which is what gives sourdough that amazing crust.
While the oven’s heating, grab your dough from the fridge. It should be nice and cold and firm, which makes it easier to work with.
The Fun Part: Scoring and Baking
Cut some parchment paper big enough to lift your loaf. Flip your proofing basket upside down onto the parchment and your dough should just pop right out.
Now for the artistic bit – scoring. I use a sharp knife or a bread lame to make one deep slash across the top. This gives the bread room to expand while it bakes.
You can get fancy with patterns if you want. I’ve done crosses, leaves, all sorts of stuff. My daughter loves when I let her carve her initials in it.
Carefully (like, CAREFULLY) take your Dutch oven out of the oven. Use good oven mitts – this thing is HOT. Lift the parchment with the dough on it and lower it into the pot. Lid on right away to trap that steam.
Bake covered for 20 minutes. Then take the lid off and bake another 20-25 minutes until it’s all golden and gorgeous.
The smell during these last few minutes? Absolutely ridiculous. Caramelizing crust, sweet blueberries, bright lemon – your whole house is gonna smell amazing.
The Hardest Part: Waiting to Eat It
Okay, real talk. This is the WORST part. You have to let the bread cool completely before cutting into it.
I know. I KNOW. It’s sitting there all beautiful and crackling and smelling incredible and you just wanna dive in.
But if you cut it while it’s hot, the inside will be all gummy and weird. The bread’s still cooking on the inside as it cools, so you gotta be patient.
I give mine at least two hours, sometimes three. Set it on a wire rack so air can get all around it.
Once it’s cool though? Game on. This lemon blueberry sourdough is amazing toasted with butter, with cream cheese, or just plain. My personal fave is toasted with a little ricotta and honey drizzle. So good.
If you’re into that honey butter combo, you’ll totally love my honey butter glazed chicken for dinner too.
Tips I Learned the Hard Way (So You Don’t Have To)
Let me save you from some of the mistakes I made when I was figuring this out.
Dealing with Juicy Blueberries
Fresh blueberries can get pretty juicy, especially when they pop during folding. If you want to minimize this, toss them in a tiny bit of flour first. It helps soak up some of that juice.
I’ve also had good luck freezing the berries for like 30 minutes before using them. They stay firmer and don’t burst as much, though they do add a little moisture as they thaw.
Kitchen Temperature Is Everything
Temperature affects EVERYTHING with sourdough. Cold kitchen? Slower fermentation. Warm kitchen? Everything speeds up.
I keep a little thermometer on my counter so I actually know what I’m working with. In winter, I sometimes stick my dough in the oven with just the light on to keep it cozy.
How to Tell When It’s Actually Ready
This comes with practice, but there are clues. During bulk fermentation, your dough should feel alive. It should jiggle when you shake the bowl, and you should see bubbles everywhere.
If it hasn’t risen much and feels kinda dense, just give it more time. The times I give you are guidelines, not laws.
Keeping It Fresh
This bread stays good for about three days at room temp if you store it cut-side down on a cutting board or in a bread box. Don’t use plastic – it makes the crust all soft and sad.
You can totally slice and freeze it too. I actually make two loaves a lot, slice one, and freeze the slices with parchment between them. Then I can just grab a slice from the freezer and toast it for breakfast. So convenient.
Fun Ways to Mix It Up
Once you’ve got this basic recipe down, you can play around with it.
Try Different Berries
Raspberries are awesome instead of blueberries. Just be extra gentle because they’re delicate. Blackberries work too – just cut the big ones in half.
I’ve thrown in whatever berry mix I had in the fridge before. Always turns out great. If you’re into strawberry stuff, my strawberry cheesecake cookies have a similar vibe and they’re ridiculously good.
Orange Instead of Lemon
Orange zest gives you this sweeter, less tangy citrus thing going on. Use one big orange or two small ones. My mother-in-law actually likes this version better and makes it all the time.
If orange’s your thing, definitely try my orange cranberry cookies during the holidays. They’re a hit every year.
Throw in Some Nuts
Toasted walnuts or pecans add this great crunch. Use about half a cup of chopped nuts, fold them in with the berries.
Go Savory
Skip the honey and add fresh thyme or rosemary with the lemon zest instead. Makes an incredible bread for goat cheese. Trust me.
When Things Go Wrong (It Happens to Everyone)
Dense, Heavy Bread
This usually means your starter wasn’t active enough or you didn’t let it ferment long enough. Make sure your starter’s really bubbly and has doubled before you use it.
Also double-check that you gave bulk fermentation enough time. It should be noticeably puffed and airy.
Gummy Inside
Nine times out of ten, this is because you cut it too early. I know waiting sucks, but it’s worth it.
Could also mean your oven wasn’t hot enough and the inside didn’t fully bake. Get an oven thermometer to check – ovens lie.
All the Blueberries Sank
Ugh, this is annoying with any fruit bread. Make sure you’re actually doing your stretch and folds properly to keep those berries distributed.
You can also try adding half after the second stretch and fold, and the other half after the fourth. Helps with distribution.
Pale, Sad Crust
Your oven might not be hot enough, or you need to bake it longer after you take the lid off. Every oven’s different, so you gotta figure out what works for yours.
Why I Keep Making This Over and Over
I’ve been making sourdough for five years now, and this lemon blueberry version is still one of my top favorites. There’s just something about pulling out a loaf that looks like it came from a fancy bakery and smells like pure summer.
My kids literally ask for this instead of birthday cake sometimes. My neighbors have learned that when they see me walking over with a loaf, good things are happening.
Sourdough’s taught me patience (which I desperately needed), attention to detail, and how to trust my gut. Every loaf’s a little different, and honestly? That’s the best part.
When I’m not making bread, I’m usually experimenting with other stuff like my classic pumpkin bread or whipping up apple hand pies for breakfast.
FAQs About Lemon Blueberry Sourdough
Can I use frozen blueberries instead of fresh?
Yeah, you totally can! Fresh berries work better because they hold their shape and don’t release as much moisture, but frozen will work in a pinch. Just don’t thaw them first – toss them in frozen so they don’t turn everything into a soggy purple mess. They might bleed a little more color into the dough, but honestly? It just makes those purple swirls even prettier.
How do I know if my sourdough starter is active enough?
Your starter should be bubbly, doubled in size, and smell pleasantly tangy (not like nail polish remover – that’s bad). I do the float test: drop a spoonful in water, and if it floats, you’re good to go. If it sinks like a rock, feed it again and wait a few more hours. Using a sleepy starter is the number one reason sourdough doesn’t rise properly, so don’t skip this step!
Can I make this without a Dutch oven?
Yep! You’ve got options. You can use a regular baking sheet and create steam by putting a pan of water on the bottom rack of your oven. Or get a baking stone and cover your loaf with a big metal bowl for the first 20 minutes. It’s not quite as good as a Dutch oven, but it’ll still give you decent results. Dutch ovens just make everything easier because they trap all that steam.
Why is my bread dense and not airy?
Usually this happens for one of three reasons: your starter wasn’t active enough, you didn’t let it bulk ferment long enough, or you degassed it too much when shaping. Make sure you’re being gentle with that dough – you want to keep all those beautiful air bubbles! Also, don’t rush the bulk fermentation. It’s better to go a little longer than not long enough.
Save This for Later!
If you’re loving this lemon blueberry sourdough bread recipe, do me a solid and save it to Pinterest! Just hit that Pin button and add it to your sourdough or breakfast board.

And seriously, share pics of your loaves with me! I love seeing how everyone’s bread turns out and what fun variations you try. Tag me so I can see and cheer you on!
Happy baking, friends! And remember – even if your first loaf isn’t Instagram-perfect, it’s still gonna taste amazing. Sourdough’s all about the journey, and every single loaf teaches you something new. You’ve got this!
Print
Lemon Blueberry Sourdough Bread
- Total Time: 24 hours
- Yield: 1 loaf 1x
- Diet: Vegetarian
Description
This lemon blueberry sourdough is a total showstopper — golden crust, juicy purple swirls, and that perfect tangy citrus punch. It’s my go-to when I want to impress without losing my mind. If you’ve made regular sourdough before, you’ve got this. If not? Don’t worry — I’ll walk you through it step by step.
Ingredients
- 500g (about 4 cups) bread flour
- 350g (1 1/2 cups) room temperature water
- 100g active sourdough starter
- 10g (1 3/4 tsp) salt
- Zest of 2 lemons (preferably organic)
- 1 tbsp honey (optional)
- 1 tsp lemon juice (optional)
- 150g (1 cup) fresh blueberries
Instructions
- Mix the flour and water until just combined into a shaggy dough. Cover and let rest for 45 minutes (autolyse).
- Add active sourdough starter, salt, lemon zest, and optional honey/lemon juice. Mix by hand until fully incorporated.
- Add blueberries and gently fold them into the dough using wet hands to avoid sticking. Expect some to burst — that’s part of the magic.
- Perform 4 sets of stretch and folds every 30 minutes over 2 hours. Cover between each round.
- Let the dough rise (bulk fermentation) for 4–6 hours at room temperature until puffed and airy (50–75% increase).
- Turn dough onto a floured surface. Gently shape into a round by folding edges in, then flip and create tension on the surface by dragging it on the counter.
- Place seam-side up in a floured proofing basket or bowl lined with a floured towel. Cover and refrigerate 8–12 hours.
- Preheat oven to 475°F with a Dutch oven inside for 1 hour before baking.
- Flip the dough onto parchment paper. Score the top with a sharp blade or lame.
- Transfer to the hot Dutch oven, cover, and bake 20 minutes. Remove lid and bake another 20–25 minutes until golden brown.
- Cool completely (at least 2 hours) on a wire rack before slicing.
Notes
Toss blueberries in a bit of flour to reduce bursting. Keep kitchen temp in mind — warmer temps speed things up. Always wait until fully cooled before slicing to avoid a gummy interior. Stores well at room temp for 3 days, or freeze slices with parchment between.
- Prep Time: 20 minutes active, 24 hours total
- Cook Time: 45 minutes
- Category: Bread
- Method: Baking
- Cuisine: American
Nutrition
- Serving Size: 1 slice
- Calories: 180
- Sugar: 3g
- Sodium: 240mg
- Fat: 1.5g
- Saturated Fat: 0.3g
- Unsaturated Fat: 1.2g
- Trans Fat: 0g
- Carbohydrates: 37g
- Fiber: 2g
- Protein: 5g
- Cholesterol: 0mg